Docker for Machine Learning Engineers
Jan 29, 2024
Here is a 5-minute crash course on Docker for Machine Learning. Let’s get started.
No more “It worked on my machine” excuses
Docker is the #1 most-used developer tool in the world, and do you know why?
Because it solves the #1 most-annoying issue that every Software and ML engineer faces every day.
And that is, having an application (e.g. a training script, or REST API) that runs perfectly on your local machine but fails to work properly when deployed to production, aka the “But it works on my machine” issue.
Let me show you how to start using docker right away, and a few tricks to speed up your workflows.
Don’t forget 🔔
To run docker commands on your computer make sure you have the docker-engine installed.
Example
Imagine you have a minimal ML project with the following structure
my-ml-project
├── requirements.txt
└── src
    └── train.py
This is a minimal Python repo for ML, where
-
requirements.txt → list of Python dependencies your code needs to run.
-
train.py → your training script, which reads training data from an external source (e.g. a Feature Store), trains a Machine Learning model, and pushes it to your model registry.
The training pipeline src/train.py runs perfectly on your machine but you need to make sure it will also run as expected in the production environment.
And for that you can use Docker, in 3 steps:
Step 1 → Write the Dockerfile
The Dockerfile is a text file that you commit in your repo
my-ml-project
├── Dockerfile
├── requirements.txt
└── src
    └── train.py
with the instructions that tell the docker-engine how to build your environment.
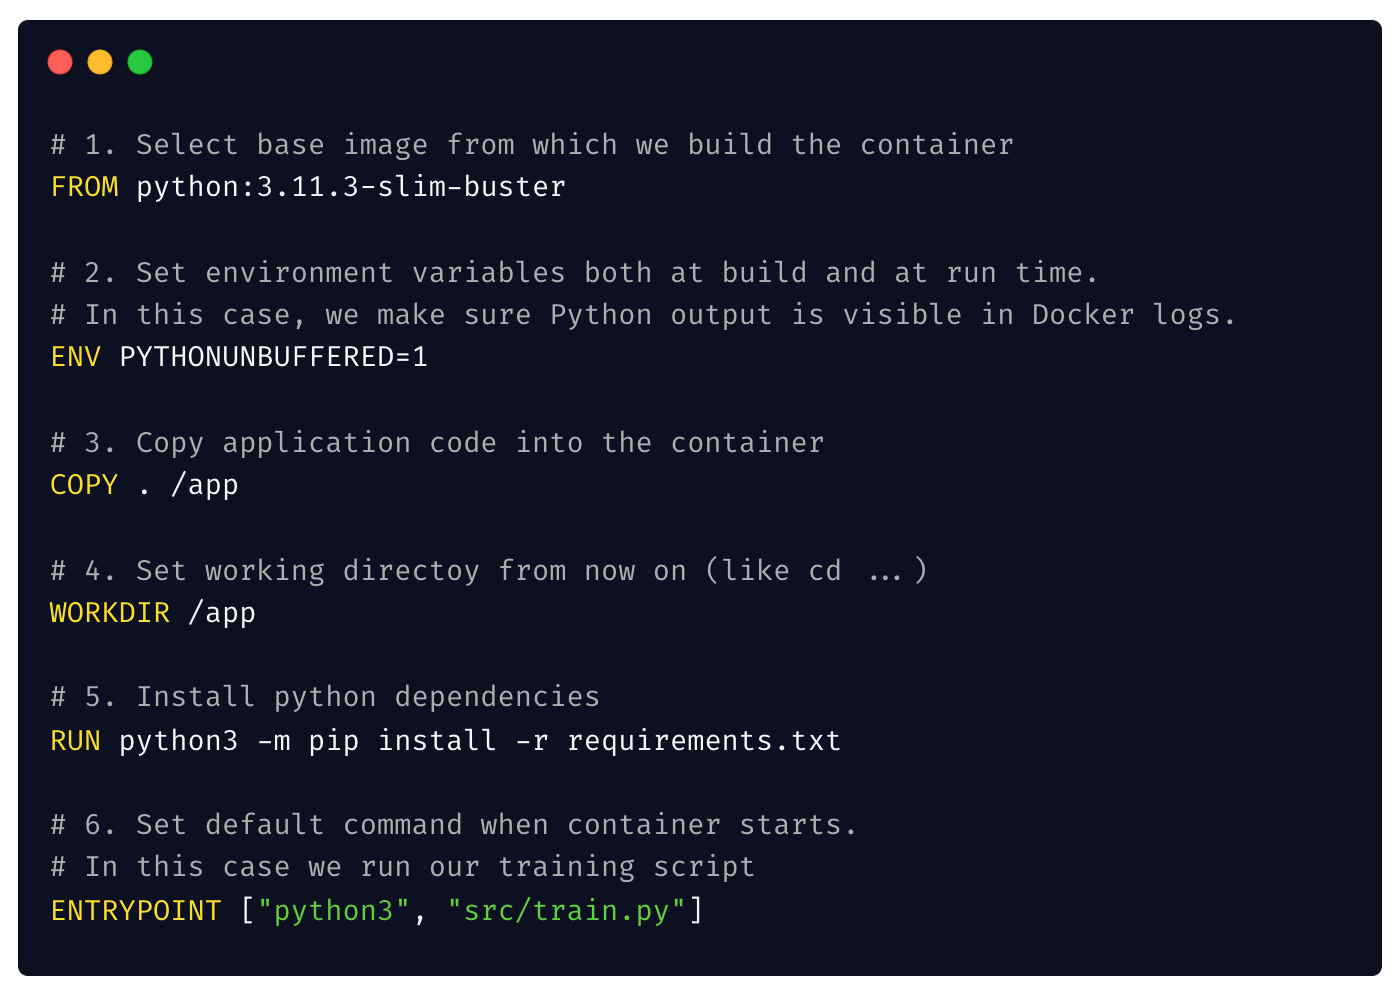
For example, our Dockerfile can look like this:

Step 2 → Build the Docker image
From the root directory of your project run
$ docker build -t my-image .to produce the Docker image.
Docker images as first-class MLOps citizens
A Docker image is an important MLOps artifact, that in the real-world you push to a remote Docker registry, so it can be fetched and run from your compute enviornment, for example, a Kubernetes cluster.
Step 3 → Run the Docker container locally
To test your dockerized training script works, you can run a container from the image you just created:
$ docker run my-imageAnd if works, YOU ARE DONE.
Because this is the magic of Docker.
If it works on your laptop. It also works on production.
BOOM!
Bonus: Speed up Docker builds 🎁🏃♀️🏃♀️🏃♀️
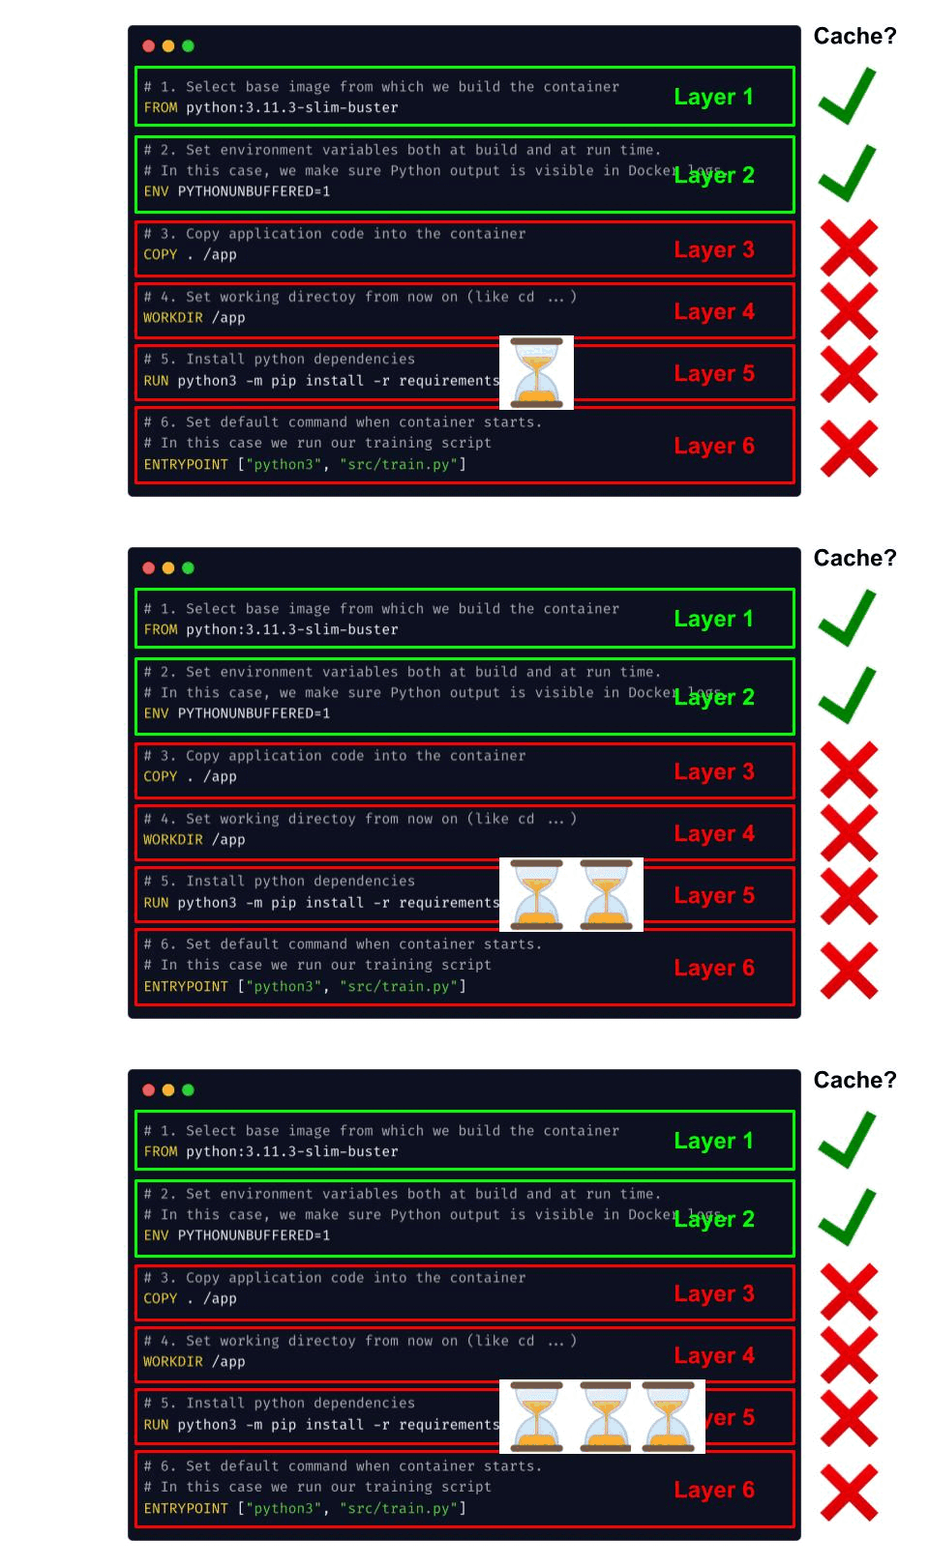
The Dockerfile I shared above works, but it is terribly slow to build.
Why?
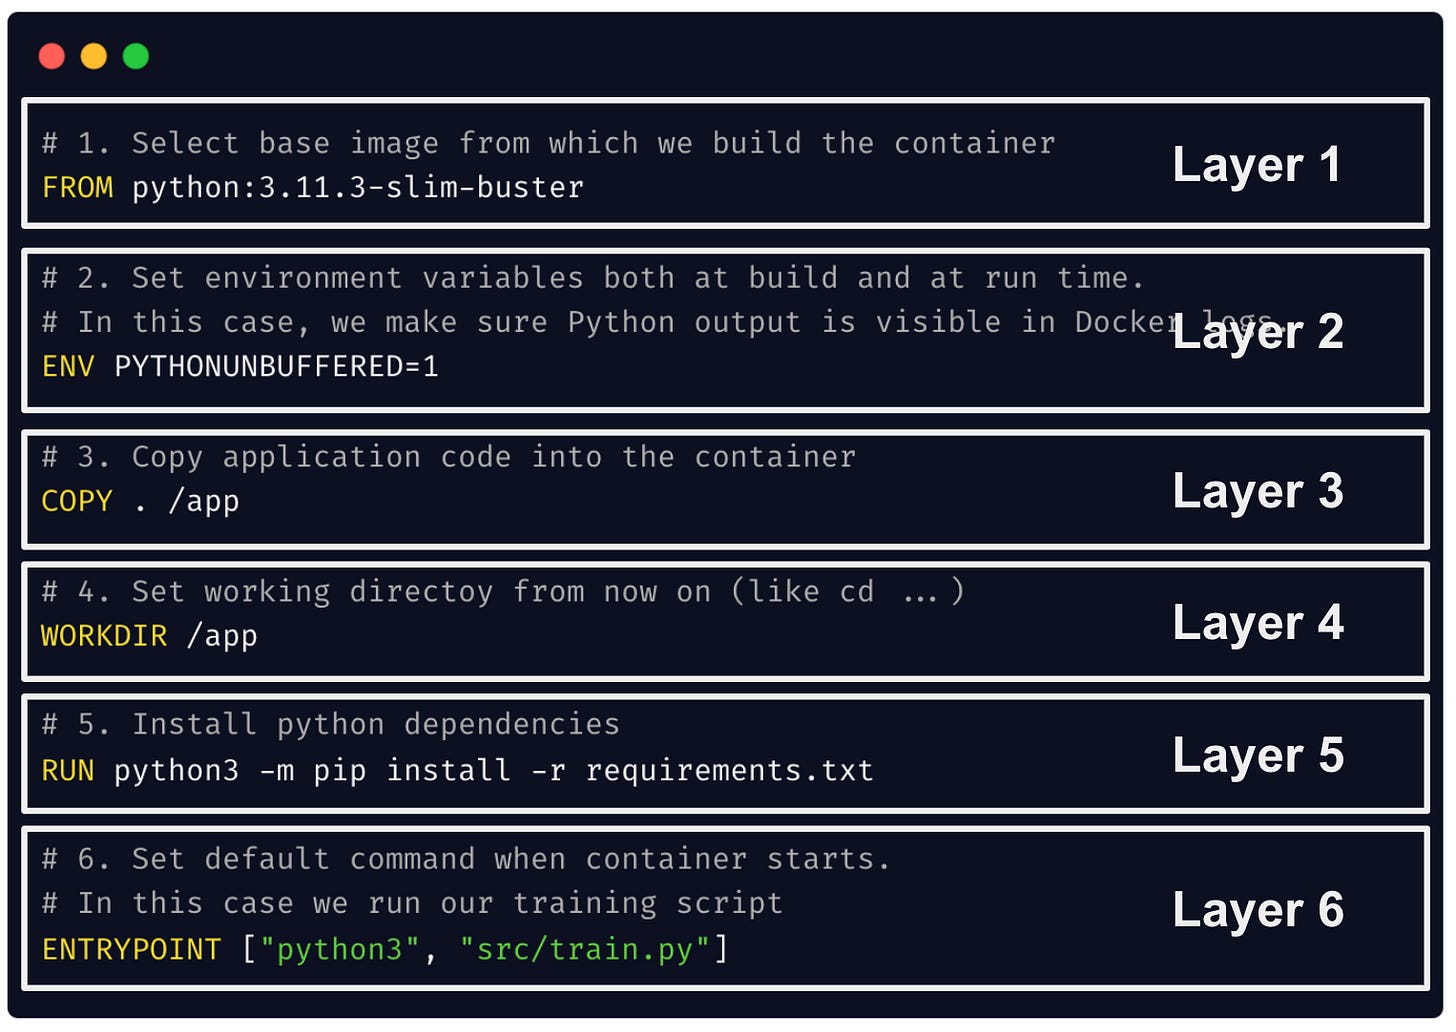
Because Dockerfile instructions are layered as a stack, with each layer adding one more step in your build process.

So, when you make changes to your training script, layer 3 will change, and all layers after it will need to be rebuilt, including layer 5. Which means, you will re-install the exact same dependencies from an unchanged requirements.txt. file.
What a waste of precious time!

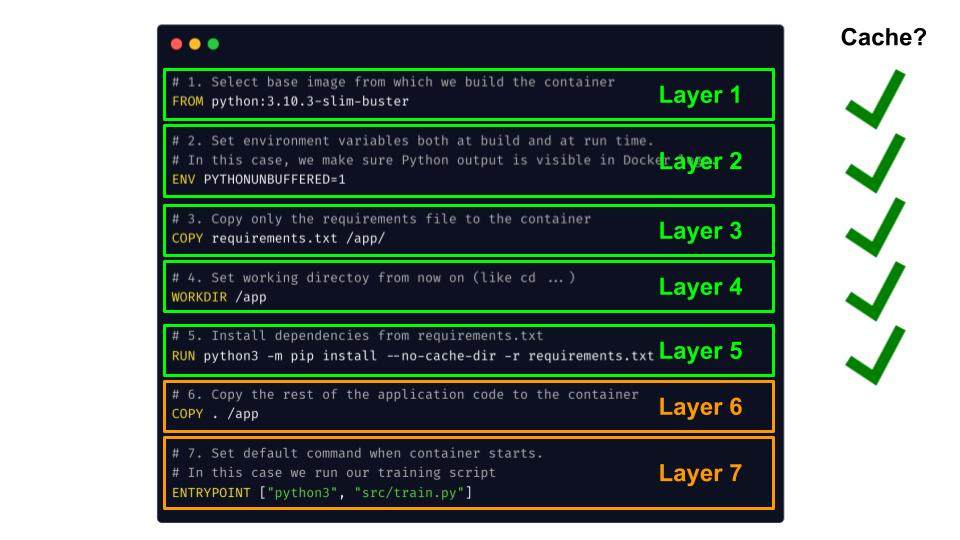
A smarter way to design your Dockerfile that uses the Docker build cache smartly is to
-
COPY the requirements.txt file first
-
Install dependencies, and then
-
Copy the rest of the code.
So whenever the code changes, only layers 6 and 7 need to be rebuilt, and layer 2 is re-used from the cache, so you don’t re-install the exact same requirements file.

Sweet.
I hope you learned something new today.
Wanna get more real-world MLOps videos for FREE?
→ Subscribe to the Real-World ML Youtube channel ←

